
General Info
Download the App
TRAKSIFY Protect is available free on the Apple App Store and Google Play. We release regular updates to add features, fix bugs and improve performance — all future versions stay free.
Current version: 4.0.0, available for both iOS and Android.
Our Commitment
TRAKSIFY Protect exists to help you look out for the people, pets, and belongings you care about — never to enable stalking. We reserve the right to revoke any account implicated in verified stalking reports, because responsibility is the root of trust.
Getting Started
🚀 Quick Start Guide – Get Started in 9 Simple Steps
Follow these steps in order to set up your Traksify device and start tracking immediately.
- Create Your Account – Download the TRAKSIFY Protect app on iOS or Android and register as a new user.
- Activate Your First Device – Immediately after registration, scan the QR code printed on your Traksify device to validate and link it to your account. The app will automatically recognise your device model (e.g. TS-300AG Companion or TS-800AG Pack) and show its product photo.
- Set Up Your Owner Profile – Fill in your personal details so your device knows who owns it. If you’ve already verified a phone number for an earlier device, it’s remembered for you here — no need to re-verify.
- Power On & Test GPS – Turn on the device outdoors, wait about 60 seconds for a GPS fix, then open the map to confirm your device’s location appears correctly.
- Tweak Your Preferences – Go to Settings → Preferences to adjust units, map behaviour, and alerts to your liking.
- Draw a Geofence – Set up a virtual boundary (geofence) around an area you want to monitor.
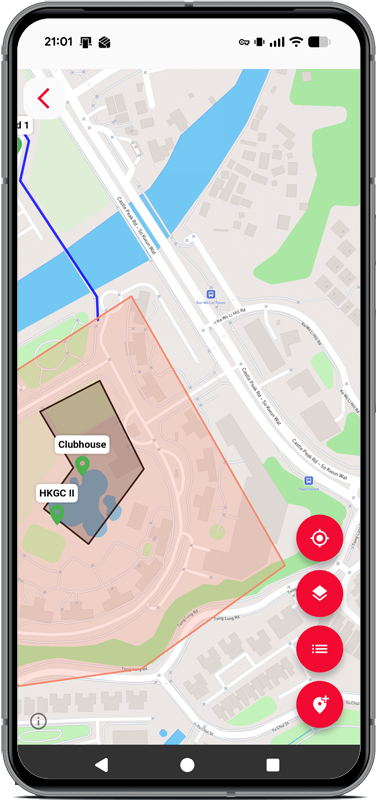
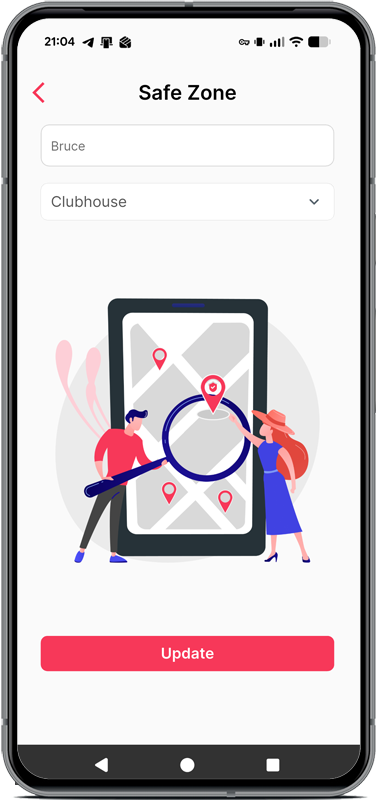
- Assign a Safe Zone – Designate a trusted area where the device can roam without triggering alerts, and see it drawn directly on the map.
- Create Notifications – Choose what events you want to be notified about (e.g., entering/leaving zones, low battery, SOS, or vibration/fall alerts).
- You’re All Set! – Your Traksify system is now active and ready to protect what matters most. ✅
💡 Pro Tip: For best GPS performance, always turn the device on outdoors with a clear view of the sky during step 4.
Required App Permissions
The following permissions are needed during registration and when using map features:
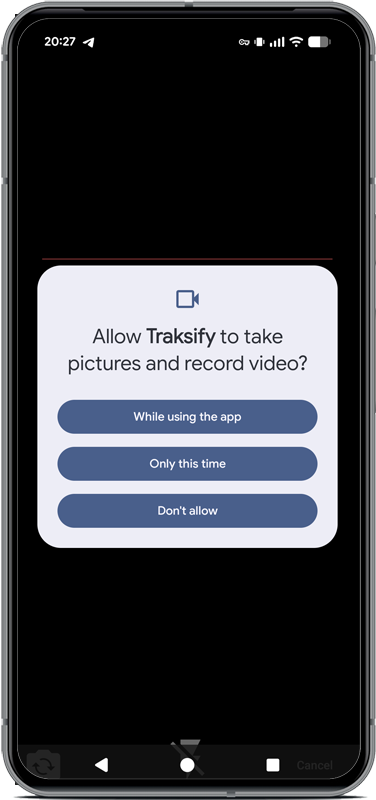
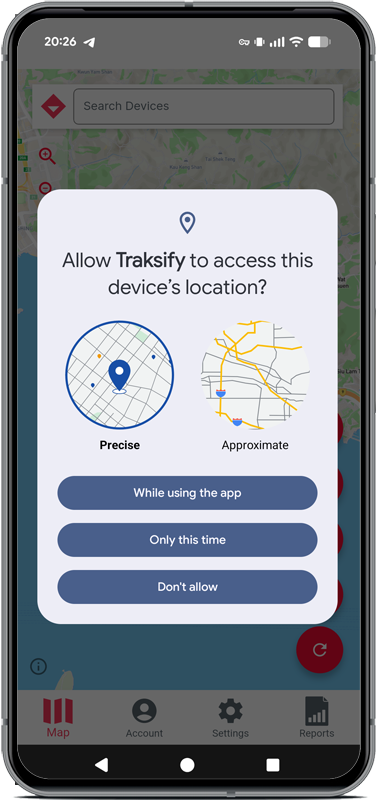
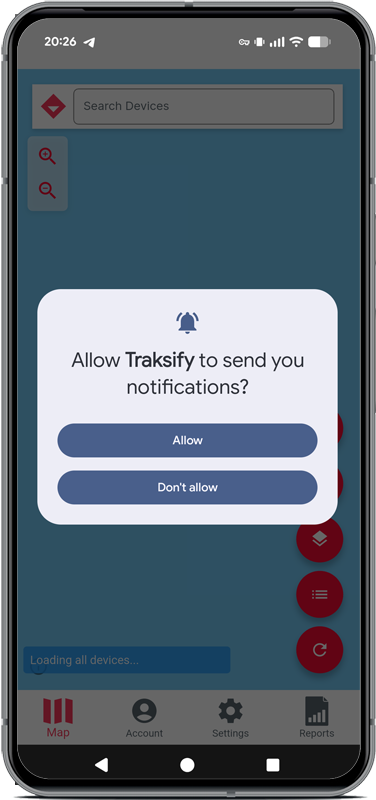
Register an Account
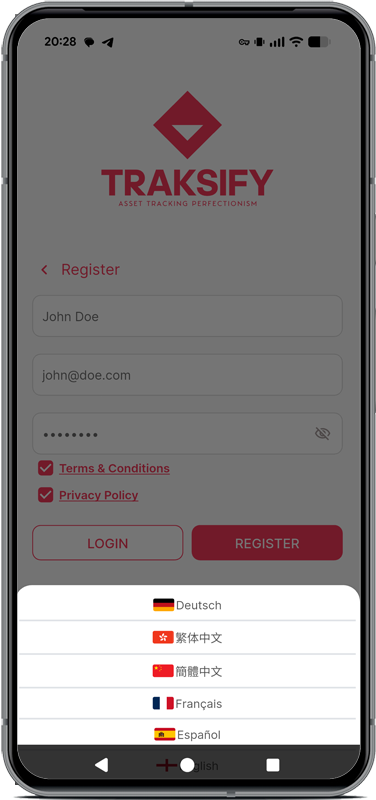
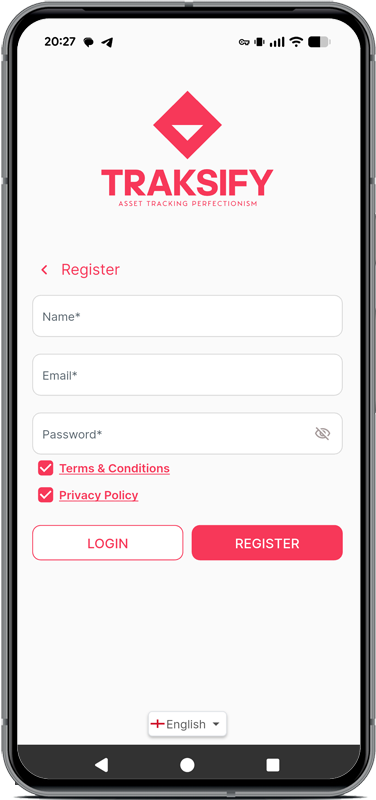
Download the TRAKSIFY App and create your free account using your full name, a valid email address, and a strong password. After registration, you’ll need to add and validate your TRAKSIFY device. You can register multiple accounts on the same device using different email addresses.
Important: Verify your email address with the 4-digit validation code sent to your inbox. This confirms that the email belongs to you.
Note: You must read and accept the Terms & Conditions and Privacy Policy before registering. Checkboxes will only become available after you have reviewed both documents.
Validate Your Device
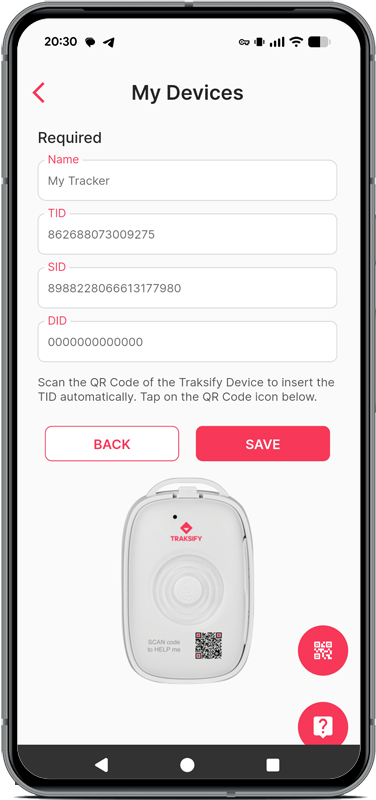
Give your device a name (e.g., “My Tracker“) and enter the TID, SID, and DID — either manually or by scanning the QR code on your TRAKSIFY device. You can skip this step and add devices later by selecting “Cancel“. Once added, a toast confirms “Device added. Please proceed to complete the activation” — make sure to finish the Owner Profile step that follows so your device is fully set up.
App Functions
Pro Tip: Always use the QR scan option when validating your device. Manually entering the TID increases the risk of errors that may prevent device detection.
Settings layout (4.0.0)
Settings is now organised into five sections so you can find things faster: Devices (My Devices, Device Control, Find My Device, Shared With Me, Community), Safety & Alerts (Geofences, Safe Zones, Notification Control), Reports & Activity (Reports, Activity report by email), Plans & Billing (Data Plan, Messaging Plan), and Account & App (My Account, Preferences, Language, Biometric options, Help & Support).
My Account
Manage your profile settings:
- Name – Edit your display name
- Email – Cannot be changed; used for notifications
- Password – Update your login credentials
- Biometric App Lock – Require Face ID or fingerprint to open the app.
- Biometric Login – Sign in with Face ID or fingerprint instead of typing your password. Enable it in Settings → Account & App; you’ll confirm once with your password and a biometric check. If biometrics aren’t available, you can always fall back to your password.
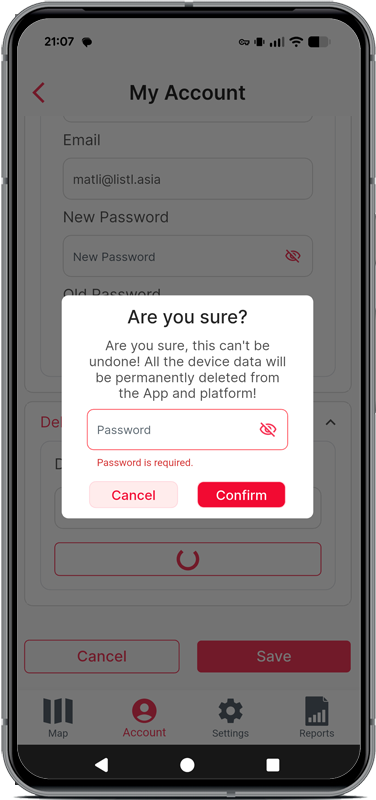
- Delete Account – Permanently remove all your data and linked devices. This action is irreversible.
Preferences
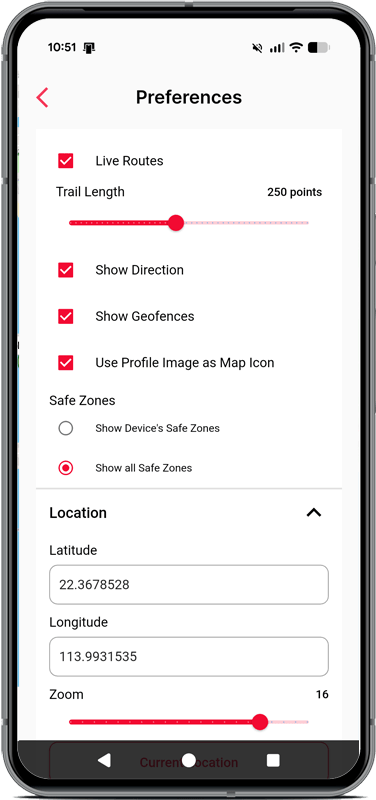
- Maps – Choose from available map providers/styles, including the Traksify Dark and Traksify Light styles
- Phone – Enter a valid mobile number for WhatsApp/SMS notifications. Verify it with a 4-digit SMS OTP. Codes are also sent to your email as a backup. Once verified for your first device, this number is remembered for future devices too.
- Units – Select your preferred measurement system
- Timezone – Pick a city closest to your location
- Location – Tap “Current Location” to set your latitude and longitude
- Zoom – Set the default map zoom level using the slider (0–20; 10–15 recommended)
- Live Trail – Show a dashed trail behind a moving device, with an adjustable trail length slider (50–500 points)
- Heading Indicator – Show an arrow on the device marker pointing in its direction of travel
- Show Speedometer – Show a live speed gauge on the map; tap it to switch device
- Use Profile Image as Map Icon – Show your device’s uploaded photo as its map marker instead of the default type icon (person, pet, or asset)
- Safe Zone Display – Choose whether the map shows only the currently selected device’s Safe Zone, or all Safe Zones across your account (the “all” option appears once you have more than one device)
Remember to tap “Save Preferences” after making changes.
Notification Control
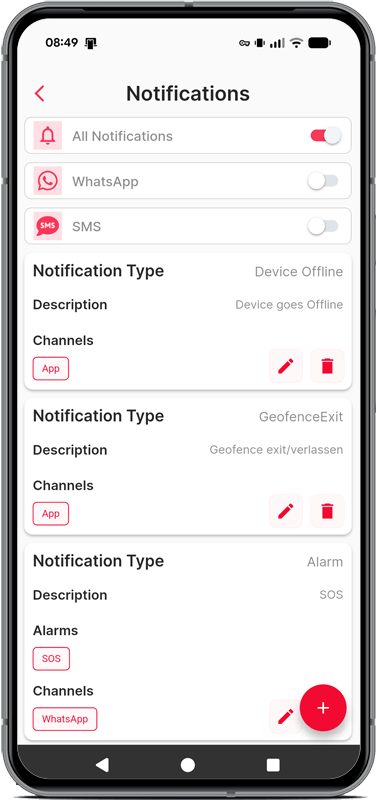
Go to Settings → Notification Control to configure alerts:
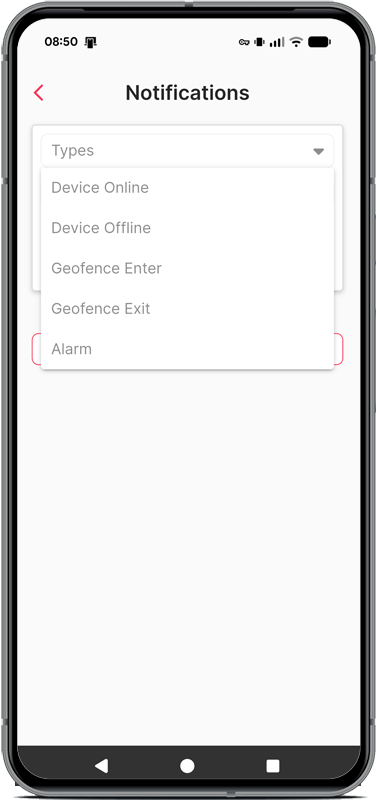
- Types – Choose from Geofence Enter, Alarm (with subtypes like SOS and Low Battery), or Vibration (for fall detection)
- Channels – Select WhatsApp/SMS, Email, or App notifications (you can choose multiple)
- Turn ON/OFF WhatsApp and SMS delivery independently
Hint: To receive SMS messages only, set the SMS toggle switch to ON and select “WhatsApp/SMS” as the channel. Keep the WhatsApp toggle OFF.
Tip: SOS messages are always prioritized and delivered regardless of your selection!
SOS & Vibration Alerts on the Map
When a device triggers an SOS or vibration/fall alarm, a red or orange marker appears directly on the live map — no need to dig through a separate list. Tap the marker to see the alert details, then tap “Close Alert” to dismiss it. Dismissed alerts stay dismissed even if you restart the app.
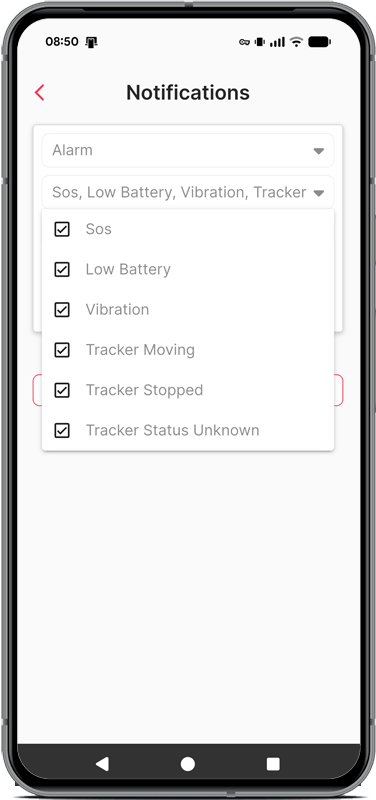
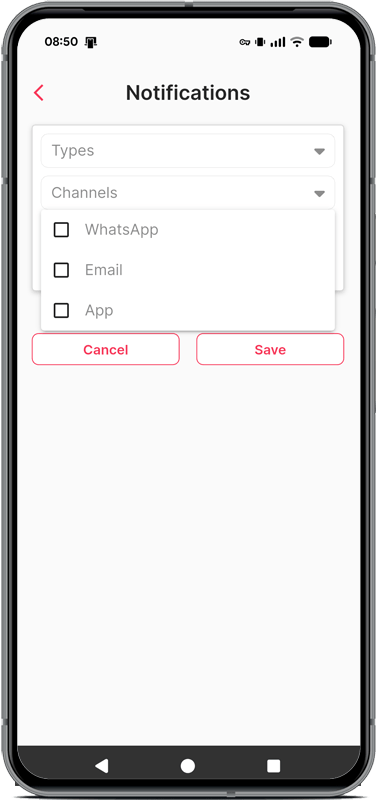
Tip: Selecting too many channels may overwhelm your inbox. Choose wisely. 50 SMS and WhatsApp messages are provided free every month. Check your usage at https://traksify.com/my-account/messaging-plan/.
Privacy Note: You can opt out of tracking notifications at any time via Settings → Notification Control. Notifications are only sent based on your preferences and serve no other purpose.
Map and Map Control
The map is the heart of Traksify Protect. Beyond your device’s live location, it now shows:
- Live Trail – A dashed line showing where a moving device has just been (enable in Preferences)
- Heading Arrow – Shows which direction your device is moving
- Speedometer – An optional live speed gauge (enable in Preferences); tap it to switch device
- Safe Zones – Drawn directly on the map as dashed outlines with a soft fill and label
- SOS/Vibration Alert Markers – Appear the moment an alarm is triggered
- Compass – Sits just above the zoom controls, rotates live to reflect the map’s current orientation, and always points to true north. Tap it to instantly reset the map back to a north-up view (handy after rotating the map with a two-finger gesture)
Panning and zooming the map is smooth and animated rather than jumping instantly, whether you’re using the on-screen zoom buttons, tapping a search result, selecting a device, or tapping a geofence to locate it.
Search
The search bar at the top of the map finds devices by name, by IMEI, and by location — start typing and matching results appear instantly. Location results are shown separately from your devices, so you can jump straight to an address or place as well as a device.
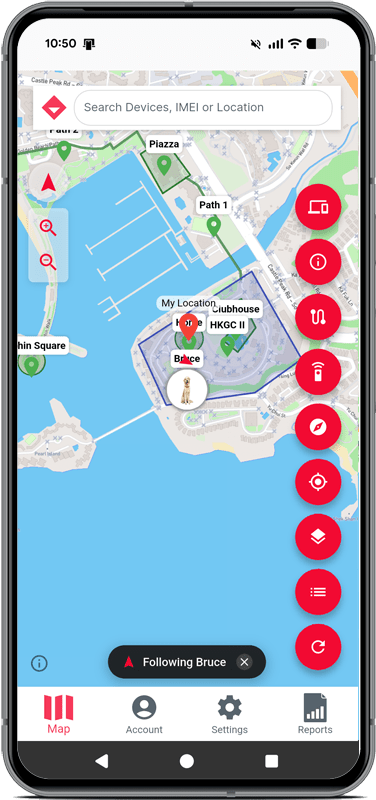
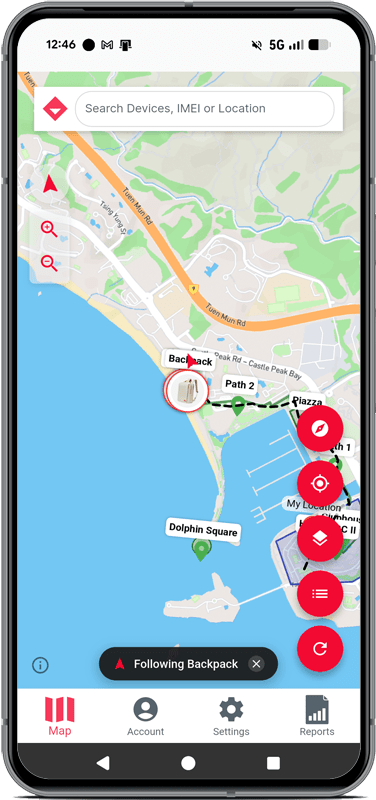
Map Toolbar Icons (top to bottom):
- Compass: Shows the map’s current rotation and always points north — tap to reset the map to a north-up view
- Zoom In / Zoom Out: Adjust the map zoom level directly, just below the compass
- My Location icon: Set your current location (uses your mobile device’s GPS)
- Layers icon: Choose a map style (Note: Available styles must first be enabled in the Preferences section!)
- Geofences icon: Display available geofences (Note: This option must be turned on in Preferences under “Show Geofences”!)
- Refresh icon: Refresh the map view
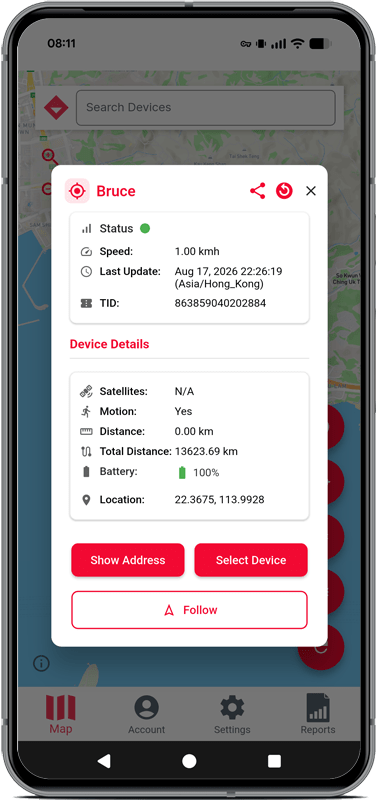
How to Use Follow‑Mode:
- Tap the device you wish to track to open its details screen (see image: Follow Mode 1).
- Select “Follow” – the map will now center on that device and follow its movements, including drawing its live trail if enabled.
- To stop following, repeat step 1 and choose “Unfollow” instead.
Geofences & Safe Zones
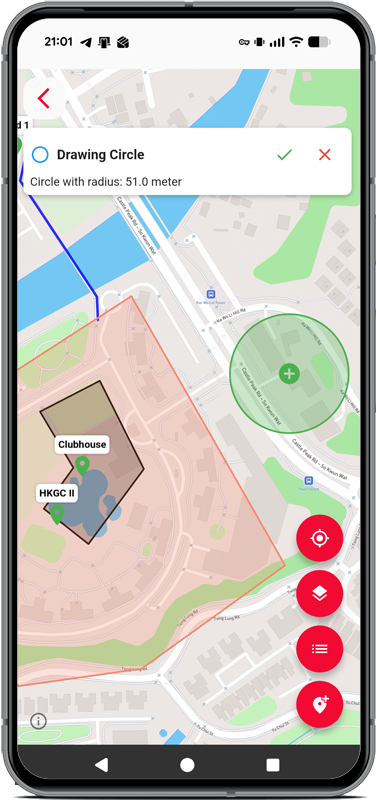
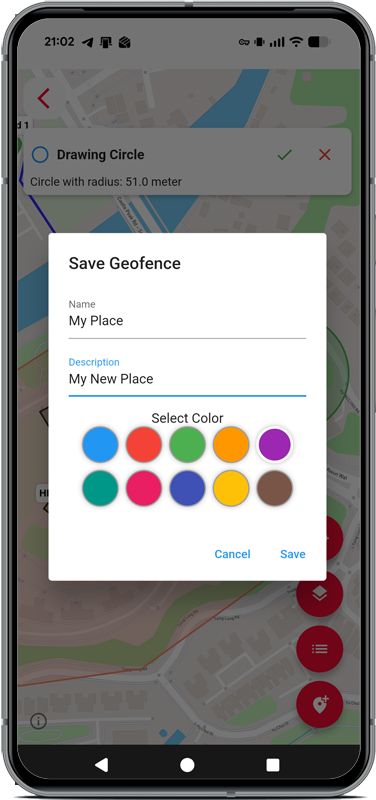
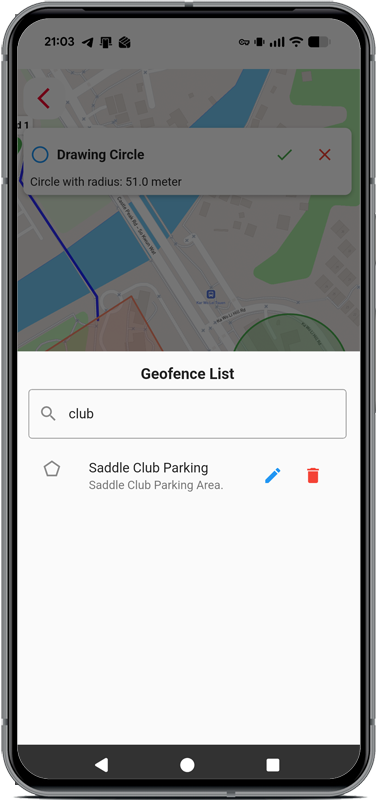
- Types – Circle, Line, or Polygon (Polygon is most common). Go to Settings → Geofences, tap the map pointer icon, select a type, and place it on the map.
- Safe Zone – Define an area (e.g., home) where your pet spends most of its time. Inside the Safe Zone, location updates are less frequent, which saves battery life. Safe Zones now also appear directly on the map as a dashed outline with a soft fill, so you can see them at a glance — choose in Preferences whether the map shows just the selected device’s Safe Zone, or all Safe Zones across your devices.
To set a Safe Zone: Go to Settings → My Devices, tap the Safe Zone icon, and select an existing Geofence.
Note: After editing, adding, or deleting Geofences, you’ll need to reassign the Safe Zone.
- Add – Create unlimited Geofences, even overlapping ones. Edit or delete them at any time.
- Link to Device – A Geofence must be linked to a device to work. Go to Settings → My Devices and tap the “Geofence” button below your device.
- Edit/Delete – Modify or remove fences as needed. Unlink and relink them to different devices.
Geofence Example:
Track Replay, Heatmap and Reports
Review past tracks, visualise activity patterns, and generate reports.
Track Replay
Open Track Replay from the map to review where a device has been. The device and time-period selector appears immediately, so you can jump straight into a replay:
- Select a device and a date/time range, then step through each recorded point using the slider, or press play to watch it move at 1x–10x speed.
- Tap any point on the trail to see its time and speed. Closing this “Point” popup no longer clears your track — reopen it any time using the info icon in the toolbar.
- If a period only has a single recorded position, you’ll see a simple message instead of a scrub bar, since there’s nothing to step through.
- Export Image – Save a snapshot of the current replay view (including any visible trail or heatmap) to share on social media or messaging apps.
- Set Map to North – Resets the replay map’s rotation, just like the compass on the live map.
Heatmap
Toggle the heatmap icon in Track Replay to see a density map of where your selected device has spent the most time over the last 30 days — green marks low-activity areas, purple marks high-activity hotspots. A small legend shows the colour scale along with when the data was last updated, with a manual refresh button. This is a great way to spot patterns at a glance rather than scrolling through individual trips.
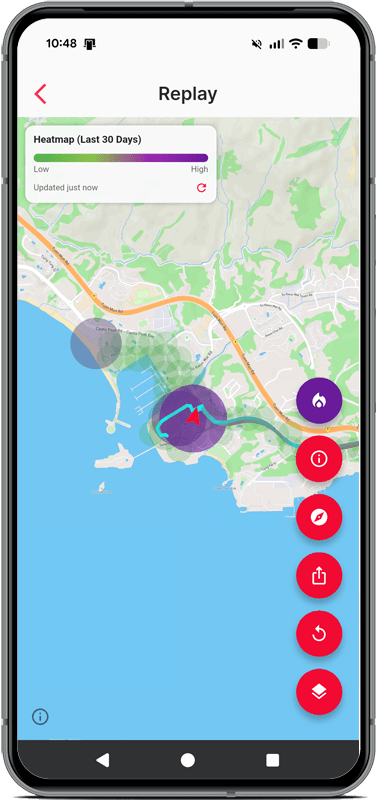
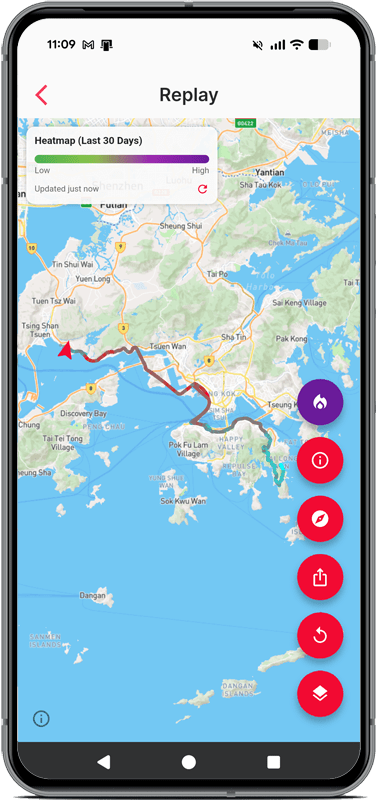
Activity Timeline
The Activities view summarises a device’s day: trips and stops, with each trip recognised automatically — walking, running, driving, and water activities such as boating or wakeboarding. You can also receive an activity report by email: go to Settings → Reports & Activity → Activity report by email and choose Off, Daily, Weekly, or Both. The weekly report arrives on Monday mornings and compares the week with the one before.
Reports
Under Reports, you can review:
- Events – A filterable log of everything your device has reported (alarms, geofence activity, and more) for a selected date range
- Activities – A summary of trips taken over a selected date range
- Stops, Speed Summary, and Monthly Usage – Additional at-a-glance reports available from the same Reports section
Device Control
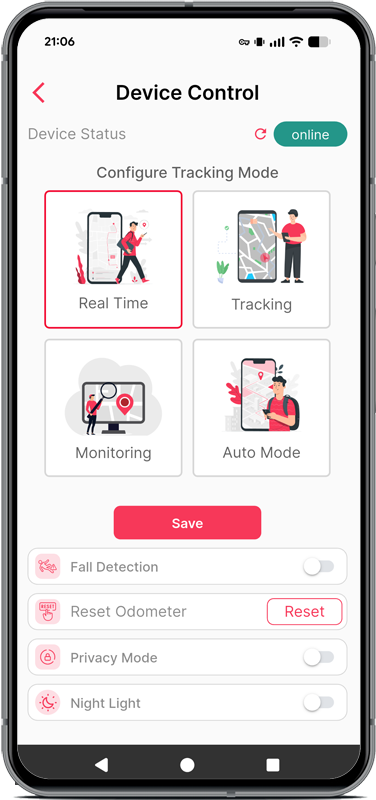
Available tracking modes:
- Real Time – 3-second intervals (use during emergencies)
- Tracking – 10-second intervals
- Monitoring – 600-second intervals (battery-saving mode)
- Auto Mode – Smart mode that balances tracking and battery life
- Fall Detection – Available only on the TS-310AG “COMPANION V2”
- Night Light – Requires firmware 1.37+
- Privacy Mode – Requires firmware 1.37+
- Reset Odometer – Reset distance tracking to zero
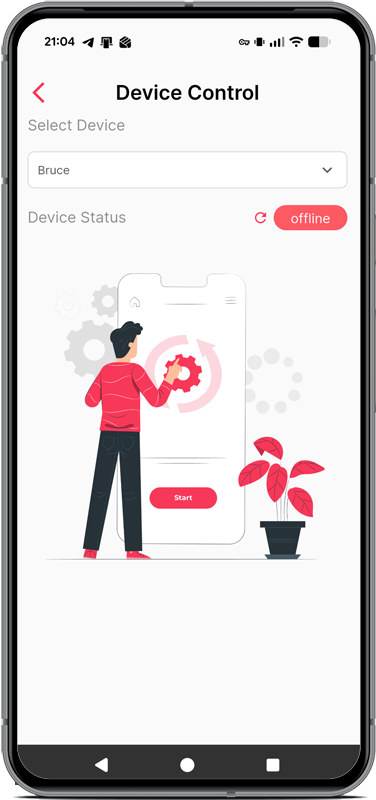
Important: Device Control requires an online connection.
How to Connect Your Device:
- Wake it up – Power on and ensure network connection
- Hold indoors – Blue and green LEDs will blink
- Wait for sync – Blue LED stops blinking when connected to the server
- Refresh status – Tap the red circular arrow (↻) next to the device status
Once the status shows “Online”, all features will unlock.
Note: Use Real Time mode only when needed. Monitoring mode preserves battery life. The device automatically enters Sleep Mode when inactive and wakes up when moved. You can only change modes while the device is online.
Find My Device
Use this feature when you’re near your device but can’t locate it (e.g., inside a bag). Tap “FIND” and the server will activate a sound and flashing light on the device. The device must be online.
My Devices
Each device in this list shows its photo (or a default icon if none is set), a small dot indicating whether it’s currently online or offline, and two dates underneath its name: Registered (when the device was first added to your account) and Last seen (how long ago it last reported its location). Manage your devices:
- Edit device name and Alias — the Alias, if set, is what’s shown throughout the app and on any shared links, instead of the auto-generated device name
- View and edit device details, including uploading a profile photo for the device
- Link Geofences
- Filter on Map – Check this to include the device among the (up to 5) devices shown together on your main map
- Set SOS call numbers (optional; requires a voice data plan)
Note: SOS calls require a valid data SIM and can only be made within the same country code as your registered number. Landline numbers are not supported. You can add up to 3 numbers.
- Delete device
Sharing a Device
Share a single device with one other person for a limited time — for example a dog sitter, a neighbour, or a family member while you’re away. You choose how long the share lasts; when the time is up, access ends automatically, and you can stop it at any moment. The recipient only ever sees the one device you shared, never your account.
To share a device:
- Open the device and tap Share.
- Choose how long the share should last (for example 1 week, 1 month, or a custom date).
- If the other person is with you, let them scan the QR code from your screen. If they’re elsewhere, tap Send by email and enter their address — they receive an invitation with the QR code and instructions.
- The recipient opens it in the free TRAKSIFY Protect app (by scanning, by tapping the button in the email, or from the push notification), taps Confirm, and enters the one-time code.
- You receive that one-time code by email and push notification (valid for 10 minutes) and pass it to the recipient — this confirms you approved the share.
Managing shared devices: open Shared Devices to see everyone you’ve shared with, each with a status (active, days remaining, or expired) and the end date. Tap Stop sharing at any time to revoke access immediately.
Shared With Me: devices that others have shared with you appear under Settings → Shared With Me, showing each device’s alias and photo so it’s easy to recognise.
Note: A device can only be shared once it has reported a recent position. The recipient needs the free TRAKSIFY Protect app installed to view the shared device. Because responsibility is the root of trust, every share is approved by you with the one-time code, is limited in time, and can be stopped at any moment.
Private Community
A Private Community is a temporary, invitation-only group where several people share their devices on one live map — ideal for a group outing such as a dog walk, a hike, or a day at the beach. Every member sees every shared device at once, and the group is warned automatically if someone drifts too far or raises an alarm. When the outing is over, the community can close itself.
Single share or community? Use a single Share when you’re handing one device to one person for a while. Create a Community when a group is out together and everyone should see every device and be alerted if one strays.
To create a community:
- Go to Settings → Community and tap Create. Give it a name (for example “Sunday Beach Walk”).
- Optionally set an end date/time so the community closes itself when the activity ends, and add the device(s) you want to share.
- Tap Invite and send an invitation to each person by email. They accept in their own app and choose which of their devices to share.
- Everyone opens the Community map — all shared devices appear together, live.
What the community does for you:
- Shared live map – every member sees every shared device at once.
- Proximity & separation alerts – members are warned if a device drifts too far from the group.
- Group alarms – any SOS or fall alarm from a member’s device is relayed to the whole community, not just its owner.
- Messages – members can send a quick message to the group.
- Your control – each member chooses what to share and can pause sharing at any time; the community closes on its scheduled end date, or when the owner closes it.
Note: To join, a member’s device must have reported a recent position and be within the distance the organiser set for the community.
Legal Information
For legal information, please visit traksify.com. You may also access the Terms of Use and Privacy Policy pages from the App’s login screen.
A note on responsible use: Traksify Protect exists to help you look out for the people and things you care about — never to enable stalking. We reserve the right to revoke any account implicated in verified stalking reports.
Account & Data Deletion
You can permanently delete all your user data, device data, and historical tracking information using the Delete Account function in Settings → Account. This action is irreversible. If you were the owner of a Private Community, it is handed to another member or closed, and any devices you shared stop being visible to others.
Warranty & Support
For warranty, product, and account support, please visit traksify.com and use the contact section to get in touch with a member of the support team.
FAQ Section
This is normal as the tracker first needs to establish a connection with the satellite navigation system. Best, go outdoors and hold the tracker in your hand. A blue blinking LED indicates that the tracker has no data network and a green blinking LED indicates that no satellite connection could be established. Both LEDs should be off while the tracker is moving. This indicates that a GPS signal has been established and that the tracker is connected to the data network and communicating with the TRAKSIFY platform and App.
Make sure the the tracker is turned on. To turn the tracker on and off press the center SOS button for at least 10 seconds and release it. The LED ring will flash to indicate that the device has either been tuned on or off. Please refer to the user instructions provided with the tracker.
Make sure that your device is linked to the geofence. From the mobile App open Settings -> My Devices -> Click on the geofence button to create the link between the geofence and the device. You may link one or many geofences to one or another device.
1. No GPS Signal
Possible Cause: The tracker may be indoors, underground, or in an area with poor satellite reception (e.g., dense urban areas, tunnels).
Solution: Move the tracker to an open outdoor area and wait a few minutes for it to acquire a GPS signal. The green LED should be OFF to indicate that the device has a valid GPS fix. A blinking green LED indicates that no GPS connention is available.
2. Weak or No Cellular Network
Possible Cause: The tracker relies on cellular data (2G/3G/4G) to transmit location. If there's no network coverage, it won’t update.
Solution: Ensure the device is in an area with cellular coverage. The blue LED should be OFF to indicate that a valid network connection has been established. A blinking blue LED indicates that no data network connention is available.
3. Low or Dead Battery
Possible Cause: If the battery is drained, the tracker won’t function.
Solution: Recharge the device fully.
4. Device is Powered Off or in Sleep Mode
Possible Cause: The tracker might be in power-saving mode or manually turned off.
Solution: Move the device to wake it up.
To adjust your timezone navigate in the App to Settings -> Preferences -> Timezone and enter the location, for example Europe/Berlin or Asia/Hong_Kong or any other available city close to your location.
The following status types are available:
- Grey: The device is offline. The grey icon indicates the last known position.
- Red: The device is online and communicating with the TRAKSIFY system. The device has stopped or is not moving.
- Green: The device is online and moving.
To change the tracking mode the device must be online (Status Red and Green). Make sure that the device is fully charged and that it is not in Sleep Mode or OFF.
Press and hold the SOS (ON/OFF) button for 5 seconds to turn the device either ON or OFF.
1. Select the Right Tracking Mode
Choose a tracking mode based on your needs to balance battery efficiency and location accuracy:
Monitoring Mode: Updates location every 10 minutes (ideal for stationary or low-risk assets like bags, backpacks, or stored items).
Tracking Mode: Updates location every 10 seconds (use when you suspect movement or theft).
Real-Time Mode: Updates location every 3 seconds (only use when actively searching for a lost asset, person, or pet).
Example:
When tracking a backpack, keep it in Monitoring Mode to conserve battery. If the backpack moves unexpectedly (e.g., stolen), switch to Tracking Mode or Real-Time Mode for frequent updates.
2. Enable a Geofence (Safe Zone)
Set up a virtual boundary (Geofence) around a safe location (e.g., home, office). Receive alerts if the device exits this zone, prompting you to switch to a more frequent tracking mode.
3. Set Up Notifications
Device Online/Offline: Get notified when the tracker connects or disconnects. Geofence Alerts: Receive alerts when the device enters or leaves a designated safe zone.
4. Recommended Setup
Start with Tracking Mode (10-second updates). If the device exits a Geofence unexpectedly, switch to Real-Time Mode (3-second updates). Use "Device Online" notifications to know when the tracker is active, then adjust modes as needed.
By following these steps, you can optimize battery life while ensuring your asset remains traceable when needed. Need help adjusting your settings? Contact our support team for assistance!
Note: It may take up to 3 minutes for the device to connect to the network.
- The blue LED will blink while connecting.
- Once the blue LED stops blinking, the device has successfully established a network connection and is communicating with the server.
For the latest status, tap the refresh icon (↻) next to the device status indicator within the Settings -> Device Control section of the App.
Generally yes. However, for a best user experience we suggest not to use a VPN connection while using the App.