Support – Creating a Geofence and Notifications
In the following section we explore setting up a geofence as well as how to correctly enable WhatApp notifications once an event is detected, such as leaving a geofence or entering a fence. A geofence could be an area like your home, office, a park, or any other location you would like to monitor and receive notifications once your device enters or leaves such area.
A notification can be used to send an email, WhatsApp or browser message once an event is detected. These notification types are referred to as channels.
Adding a Geofence for Current Location
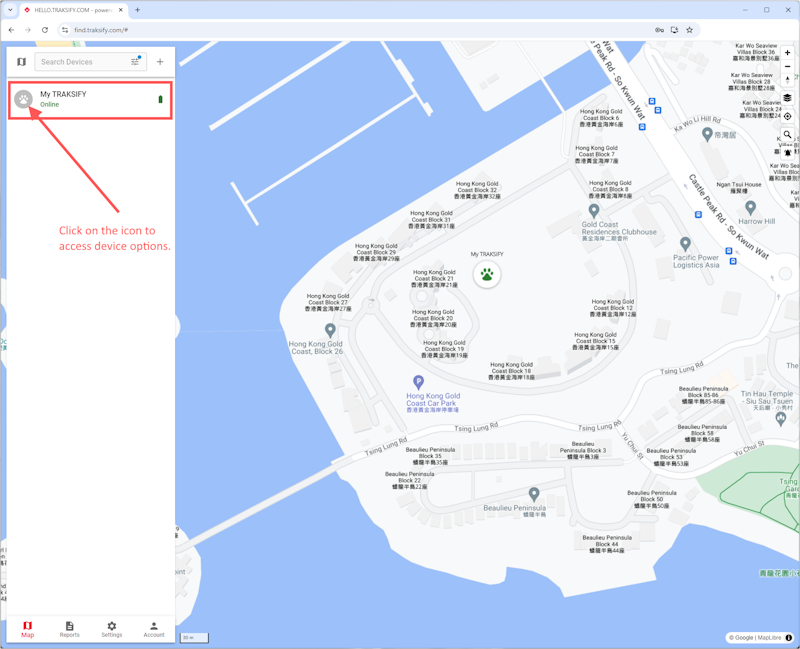
- Select the device for which you would like to add a geofence at the current location of the device.
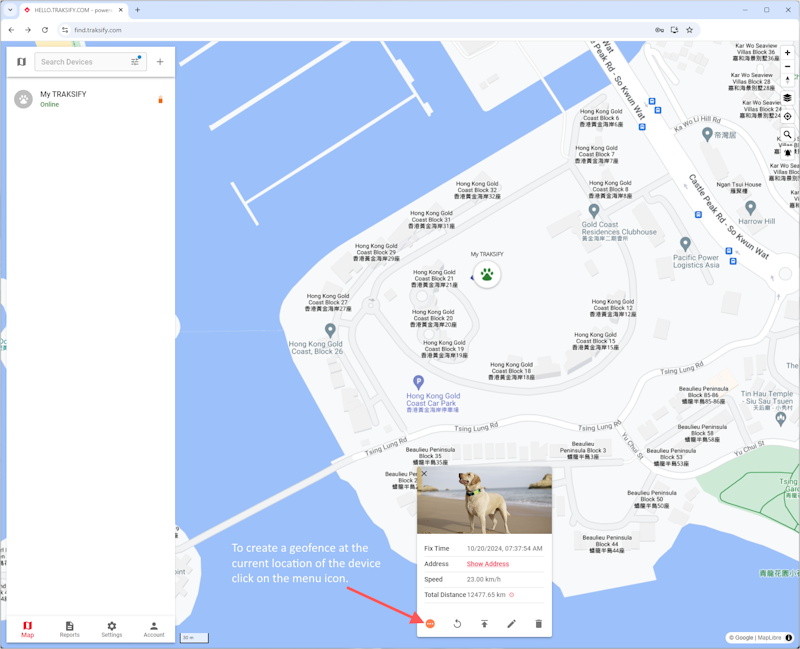
- Click on the round menu icon.
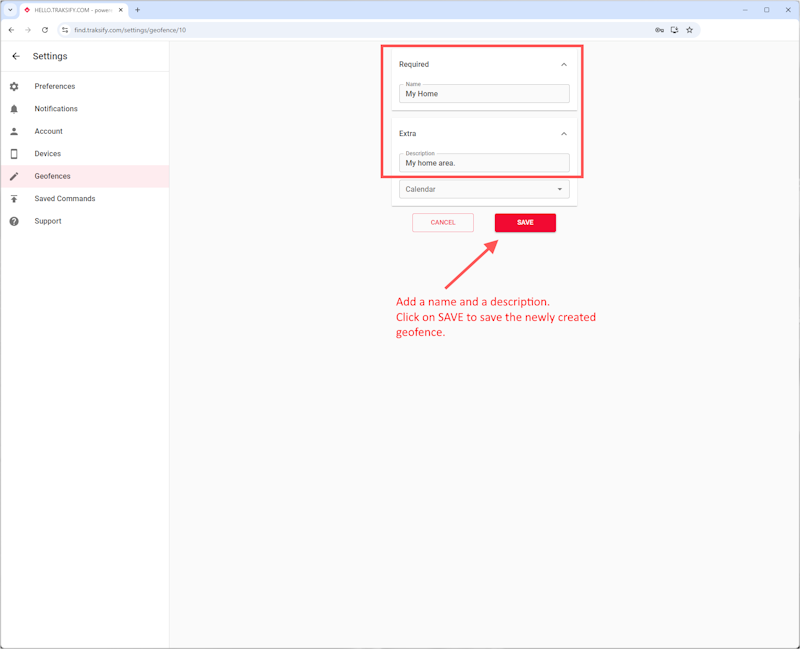
- Enter a name and a description for the newly created geofence. And click SAVE to save the new geofence.

Adding WhatsApp Notifications
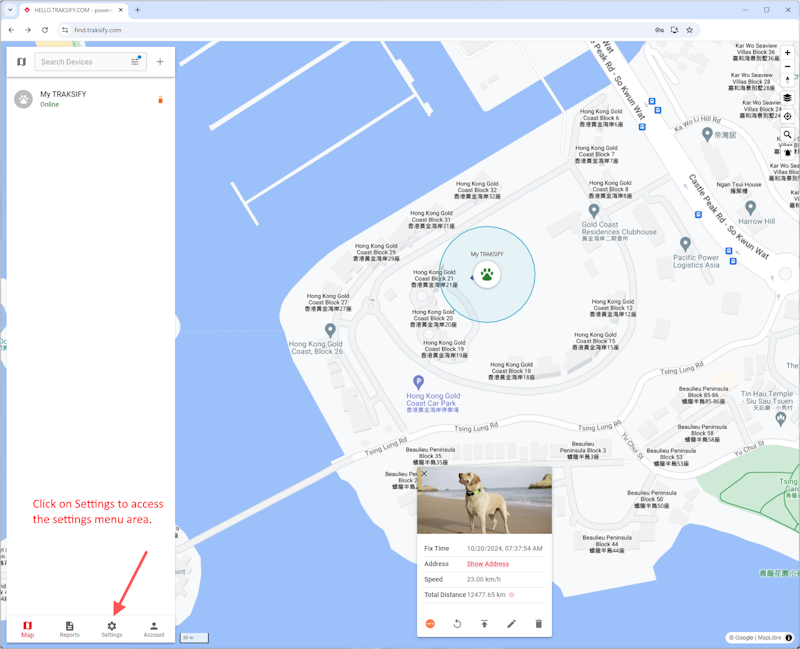
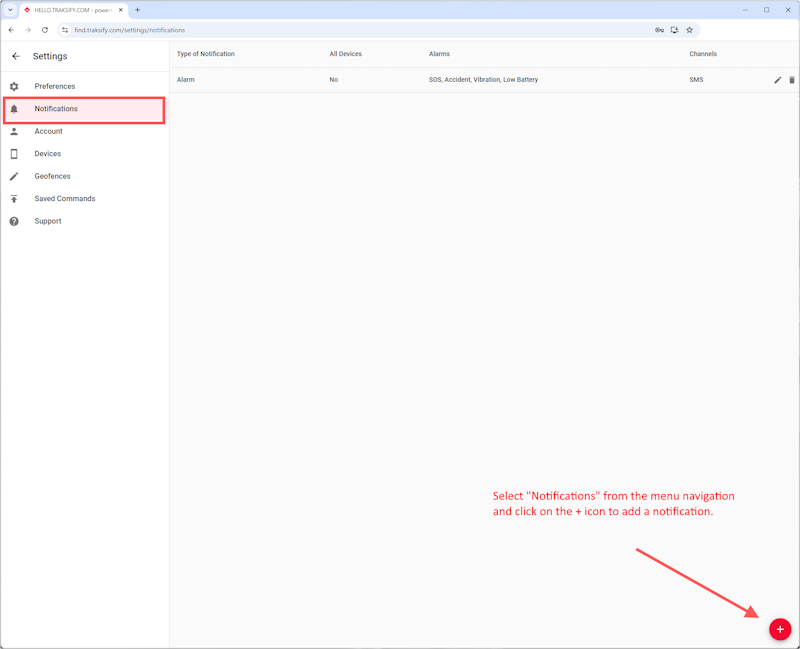
- Click the settings menu icon.
- Select the “Notifications” menu item.
- Click on the + icon in the bottom right corner of your bowser to add a new notification or click on edit to change an exsisting notification.
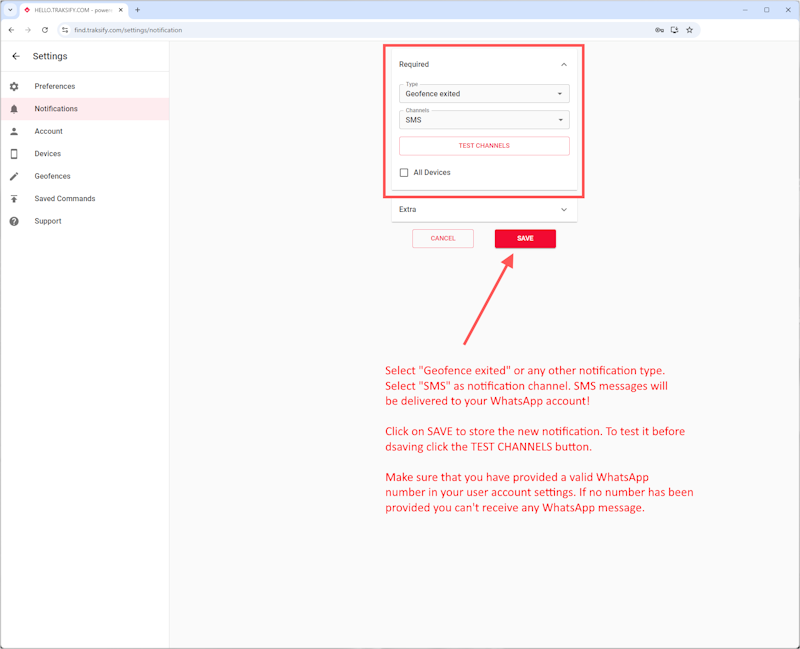
- Pick the type of notification, e.g. Geofence entered and select the channel you would like to be notified at. Use the SMS type to receive WhatsApp notifications.
- You can test the notification before you save it to your notifications settings.
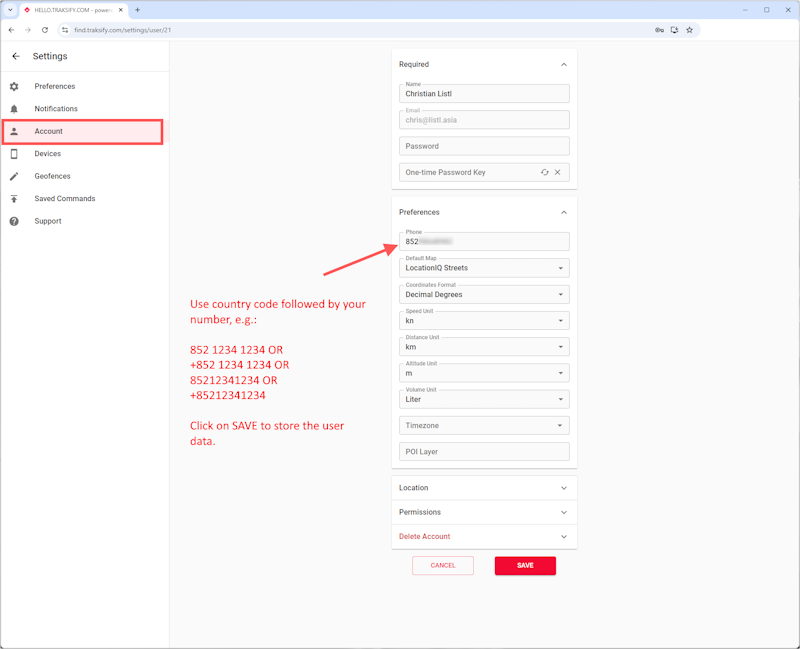
Important: In order to receive WhatsApp messages you must add a valid WhatsApp mobile number to your account. To do so go to Account >> Preferences >> Phone. A valid format is for example +852 5500 3499 or 85255003499. In both cases the country code must always come first. Spaces and a leading + are allowed.
Alemanni Private Limited | © 2024 | All Rights Reserved | This site is protected by reCAPTCHA and the Google Privacy Policy and Terms of Service apply.
TRAKSIFY is a registered trademark registered with the Trade Mark Registry of The Government of the Hong Kong Administrative Region.